There has been an uptick in demand for mechanical keyboards across a number of different markets, including the gaming industry, the programming industry, and the writing industry. In contrast to standard keyboards, mechanical keyboards have individual mechanical switches underneath each keycap. Traditional keyboards do not have this feature. These switches offer a tactile feedback experience, in addition to being long-lasting and durable. However, because of the way they are built, mechanical keyboards require a great deal more upkeep than their membrane-based counterparts do. This is because of the way their keys are arranged. In this article, we will discuss the most effective ways to clean a mechanical keyboard so that you can maintain its functionality for the longest period of time possible.1. Accumulate all of the Required Janitorial EquipmentBefore beginning the process of cleaning, which comes first, it is necessary and absolutely essential to gather all of the essential cleaning materials. This kit contains a keycap puller, a small brush, a compressed air canister, a microfiber cloth, isopropyl alcohol, and a bowl of warm water. In addition, this kit also includes a bowl of warm water. You can get these items at the computer store in your neighborhood or on the internet. Both options are available.

The second step is to remove the keycaps. When cleaning a mechanical keyboard, the first thing you need to do is remove the keycaps and put them in a separate container. Make use of a device known as a keycap puller in order to carefully remove each keycap. Take your time and be careful so that the keys don't get broken or otherwise damaged in any other way. When you have removed all of the keycaps, place them in a bowl of warm water with a very minimal amount of dish soap, and then set the bowl to the side. Give them about ten to fifteen minutes to marinate in the liquid before removing them.
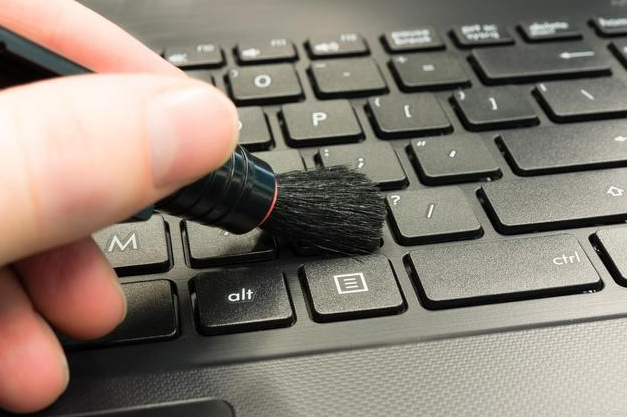
Scrub the Top Plate of the KeyboardWhile the keycaps are soaking, clean the keyboard plate by using a small brush or a compressed air canister to remove any debris or dust that may have accumulated there
-
It is imperative that you place a heightened level of emphasis on the spaces that exist between the switches
-
You can get rid of any dirt or dust that has accumulated by using a can of compressed air to blow best gaming keyboard out of the area
4. Clean the tops of the keycaps with a damp cloth. After you have completed the soaking procedure with the keycaps, you should wipe them down with a cloth made of microfiber to remove any residue. Before you use the keycaps, you need to make sure that they have been meticulously cleaned on both sides. You can also use a toothbrush to clean any areas that are difficult to reach if you want to. After the keycaps have been cleaned, they should be wiped down with clean water, and then they should be allowed to dry on a towel or a piece of paper towel so that the air can circulate around them.
5. Ensure that the Switches Are CleanedYou can clean the switches by removing any debris or dust that may have accumulated by using a small brush or a compressed air canister. Either method will work for the purpose of cleaning the switches. Take extra precautions to ensure that the switch itself does not get damaged during the process. Another option for cleaning the contacts of the switch is to use an isopropyl alcohol-soaked cotton swab. This can be done in the same manner as described above. Make sure the switch has had enough time to completely dry out before reinstalling the keycaps. If best gaming keyboard hasn't, you won't be able to use the keycaps.
6. Reassemble the best gaming keyboard From Its Separate PartsAfter making certain that each component is spotless and completely dry, reassembly the keyboard after making sure to do so. To get started, take off the keycaps and then put them back on, this time making certain that each key is properly aligned and has a snug fit. By pressing each one of the keys in turn, you can check to see if any of them are malfunctioning. After the keycaps have been attached, the keyboard needs to be wired up and put through some sort of test to make certain that everything is functioning as best gaming keyboard should.
7 - Tips for MaintenanceThere are a few different tips for maintenance that you should follow in order to keep your mechanical keyboard in good condition. These tips are listed below. To begin, whenever you are eating or drinking, you should keep your distance from the keyboard in order to prevent accidental spills and the introduction of debris. This will help keep the keyboard clean. The second step is to clean the keyboard on a regular basis with a can of compressed air or a small brush to prevent dust and debris from accumulating on the keys of the keyboard. Lastly, but certainly not least, you ought to give some thought to purchasing a keyboard cover in order to protect it from accidental spills and other forms of damage.
To summarize, cleaning a mechanical keyboard is a simple task that calls for nothing more than some common cleaning supplies and a modest amount of manual labor. It is important to remember that the keycaps need to be removed and that the keyboard plate as well as the switches need to be cleaned before the keyboard can be used again. In order to ensure that the keyboard remains in good condition over time, it is essential to perform routine maintenance on it. This includes ensuring that no food or liquids are spilled on the keyboard and regularly cleaning it. If you follow these simple instructions, you will be able to ensure that your mechanical keyboard will continue to function correctly for many years to come.